threadWEAR 301
How to Sew Darts in 5 Easy Steps
Sewing darts is tricky.
If you get it right, they can transform your clothes. They'll give you a designer-like finish that your friend will be jealous of and you can be proud of.
But if you get it wrong?
It'll look so bad, you'll probably banish your garment to your wardrobe forever, never to see the light of day again.
That's why in this article, we'll show you:
- How to sew darts in 5 easy steps
- How to sew different types of darts (contour darts, French darts, dress darts), and
- How to deal with common problems beginners run into while sewing darts
There's a lot to cover, so let's get into it!
What Is a Dart?
Darts are small, triangle-shaped folds that you sew to your garments to give them a better shape.
You typically find darts in fitted clothing, but they can also be used to enhance any sewing project you may have.
Darts are often sewn into the bust, waist, shoulders, or hips to shape your clothes with the curves of your body, giving your garments a clean and professional-looking finish.
What You Need to Sew a Dart
To sew a dart, all you need is a pattern with darts, and:
- A sewing machine
- Thread
- Chalk or any fabric marker
- A ruler
- Fabric pins
- Iron
- (optional) Screw punch
With those six tools, you're all set to sew darts.
How to Sew a Dart in 5 Steps (Simple Tutorial)
Step #1: Understand the Parts of a Dart
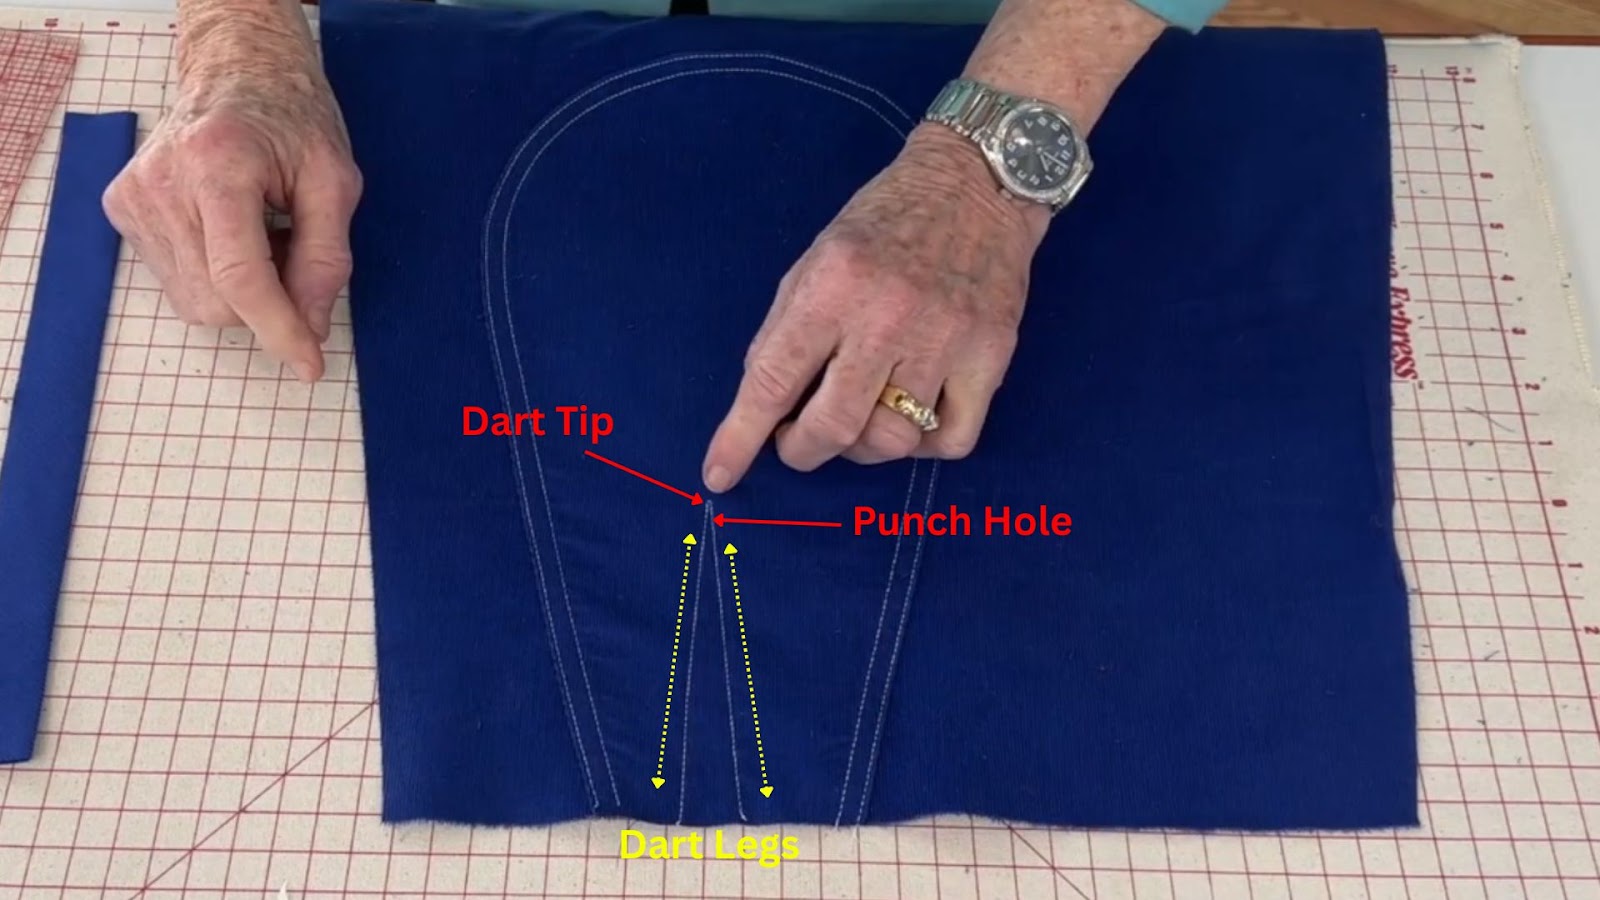
There are three parts of a dart: the dart legs, the dart tip, and the punch hole.
- Dart legs are the sides of the dart. These create the shape and guide you while sewing.
- The dart tip is the sharp tip of the dart triangle, where the dart legs meet.
- A punch hole is a marking usually ½" away from the dart tip. Some patterns include this as a guide to help you know where the tip is as you sew.
Step #2: Mark Your Fabric
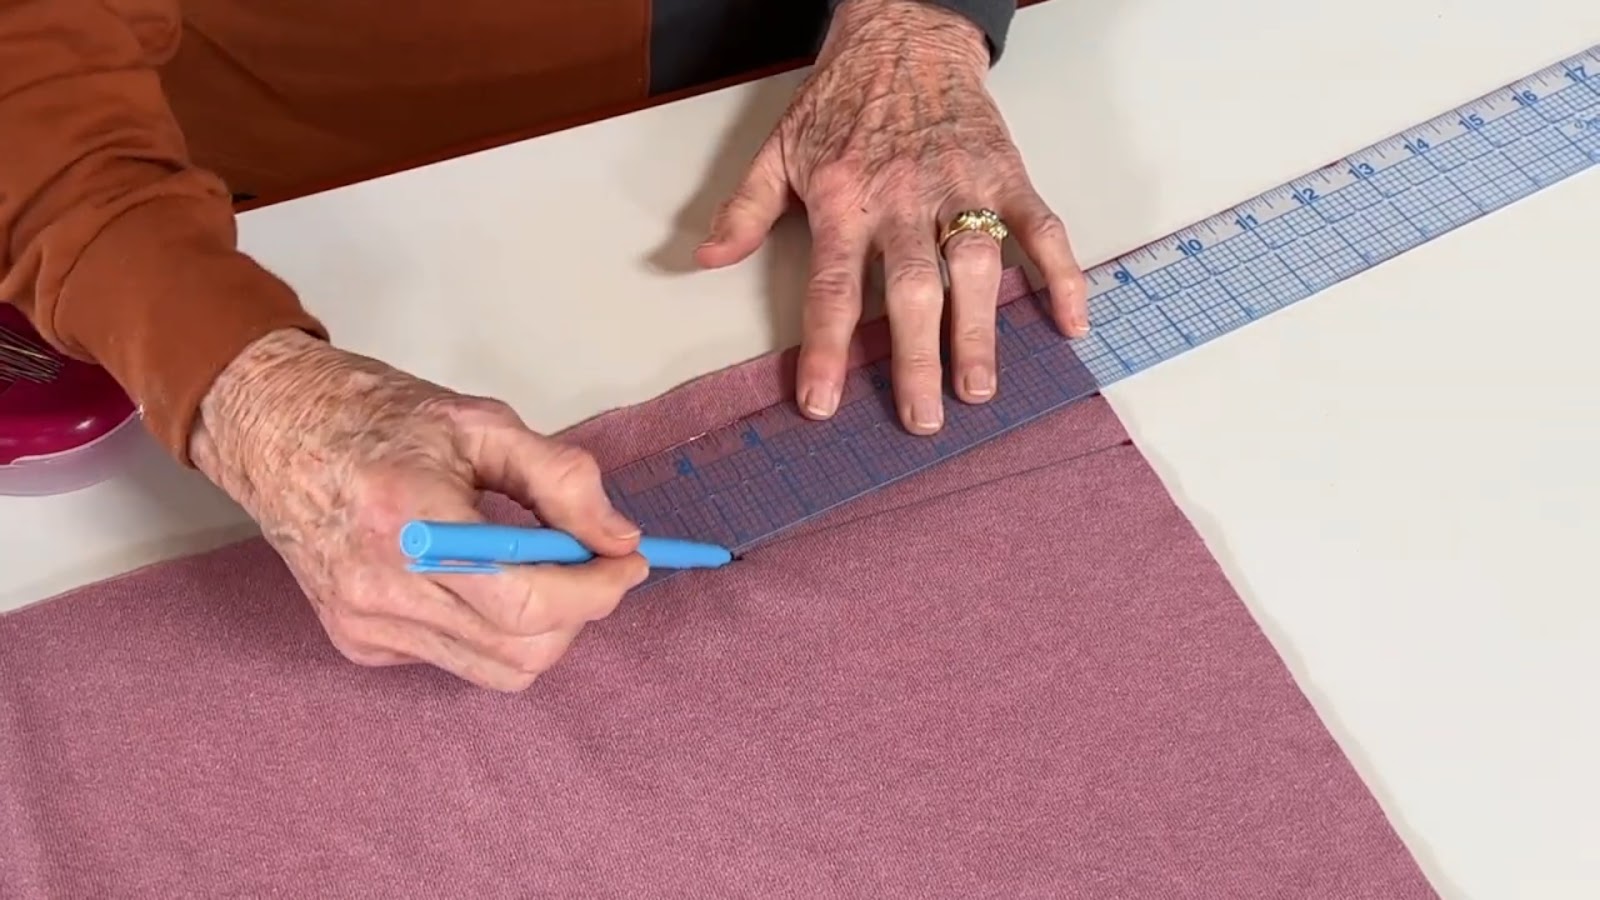
- Take your pattern and mark the ends of the dart legs and the dart tip on the wrong side of your fabric.
- Then, remove the pattern, and using a ruler, draw straight lines from the ends of the dart legs up to the dart tip.
- Finally, mark the punch hole. If your pattern doesn't have a punch hole, add a horizontal marking about ½" from the dart tip.
Note: if you're having a hard time marking the dart tip accurately (because the fabric is under the pattern paper), use a screw punch to bore a hole in the pattern where the dart tip is, and mark through the pattern.
If you don't have a screw punch, be sure to double or triple check that your dart tip marking is in the right place since accurate markings are essential for sewing clean darts.
Step #3: Fold and Pin Dart Legs
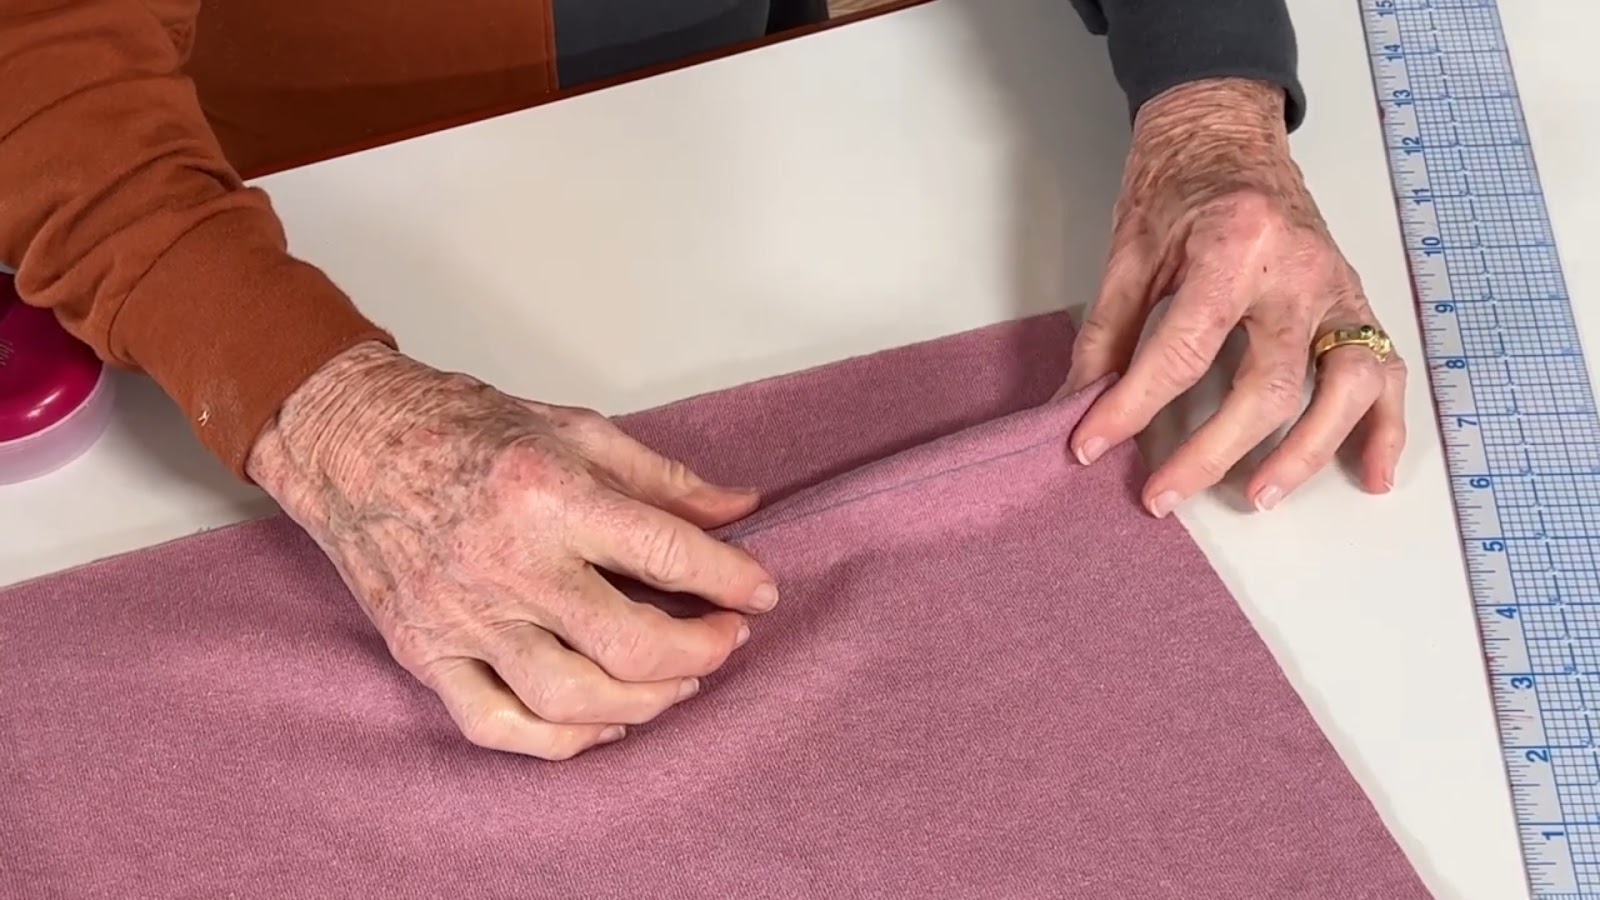
- Pinch and fold the middle of the dart to bring the dart legs together (with the right sides of the fabric facing each other), and carefully align them.
- Insert a pin perpendicularly through one dart leg and out the other, ensuring perfect alignment. Use several pins if your dart legs are longer.
During this step, it's crucial to ensure that the dart legs are perfectly aligned. If they aren't perfectly aligned, you may find that one side of the dart is longer than the other.
Step #4: Sew The Dart
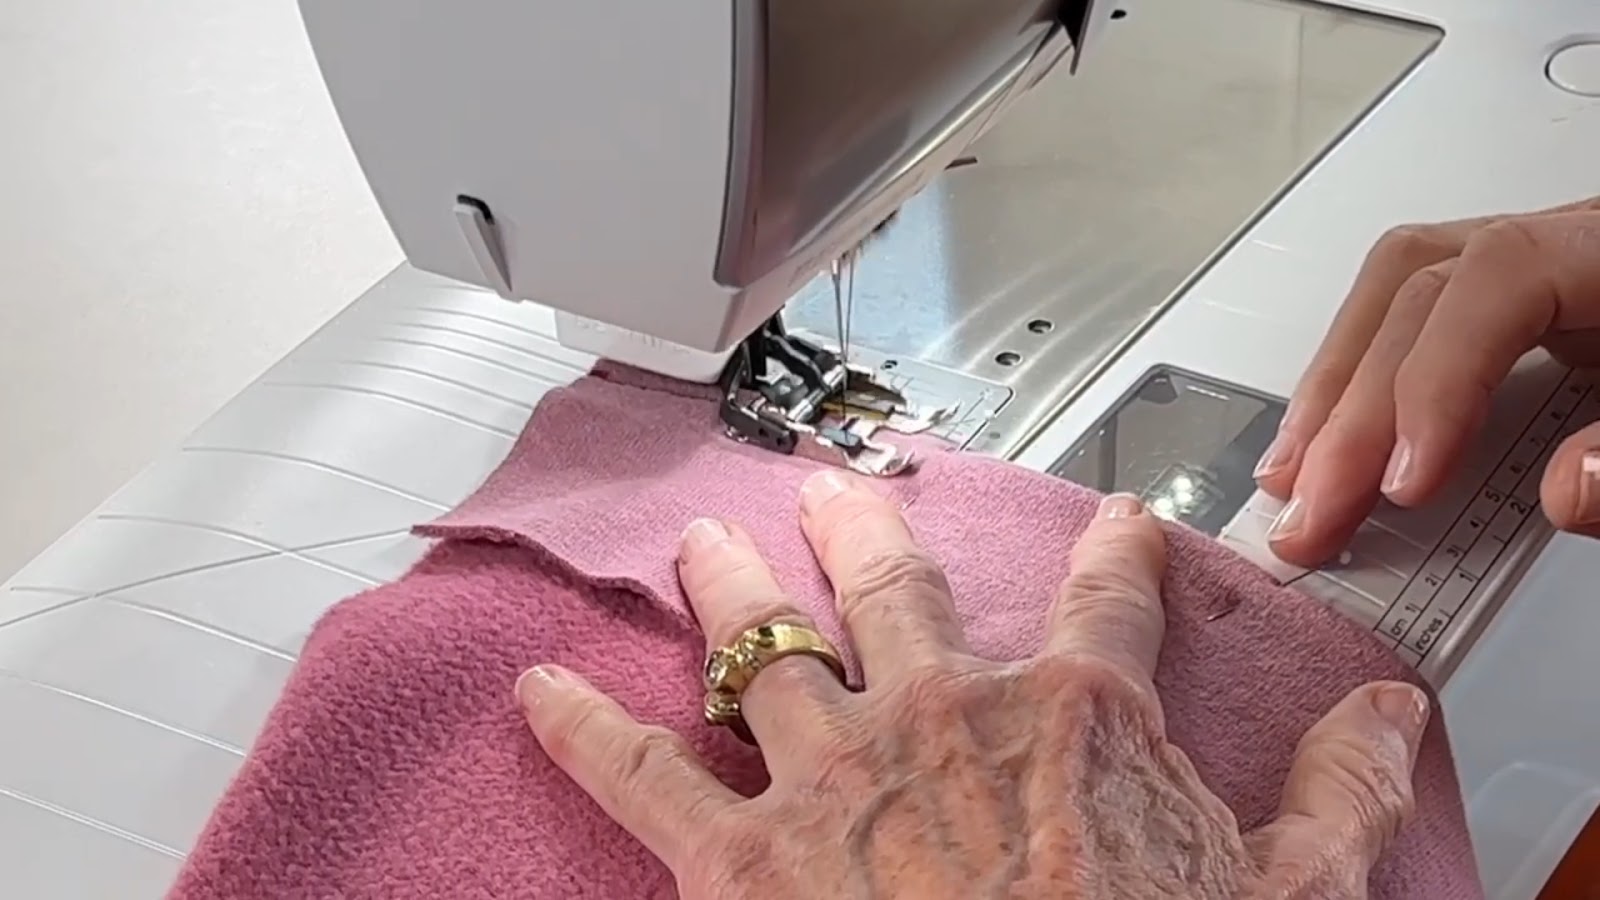
- Sew the dart legs together, starting from the bottom and making your way up to the dart tip.
- Once you reach the punch hole, change your sewing machine's settings to the smallest stitch size.
- Sew up to the dart tip, until the machine stitches off the fabric.
- Tie a simple knot at the end of your thread.
You only use a backstitch at the bottom of the dart legs, not at the dart tip. This ensures that your dart won't look bulky once you flip it over.
When you sew off the dart tip, leave a little extra thread before cutting, since you'll need enough to tie a knot.
Step #5: Press and Finish
- Press the dart towards the direction indicated in your pattern.
- Use a tailor's ham or the edge of an ironing board for best results.
Using a tailor's ham, the edge of an ironing board, or whatever hard, curved object you have for pressing will give your darts a much cleaner finish than if you press without them.
Once you're finished pressing, flip your fabric so it's right side out, and you're done!
How to Sew Different Types of Darts
How to Sew a Contour Dart
Contour darts are diamond-shaped darts that remove fabric from the top and the bottom of the dart, allowing them to follow the curves of your body better than a regular dart.
Since they are diamond-shaped, contour darts don't have an edge like regular darts do.
The easiest way to sew these is to:
- Start sewing from the middle of the dart.
- Sew either the topside or the bottomside of the diamond first, the same way you'd sew a regular dart.
- Flip your fabric over and sew from the middle to the other side.
How to Sew a French Dart
French darts are long, curved, diagonal darts that you typically find in blouses and dresses. These darts are typically wider and longer than regular darts, and they give a lovely, feminine finish to your garments.
The main differences between a French dart and a regular dart are:
- French darts are longer and wider than regular darts.
- You may want to hand-baste your French dart along the seamline to prevent it from moving as you sew.
- You typically cut down the middle of a French dart instead of leaving it folded like a regular dart.
Other than that, the steps for sewing a French dart are the same as for a regular dart.
How to Sew a Dart on a Dress
Dress patterns often call for a combination of regular, contour, and French darts.
While sewing darts on a dress, try to keep the dart points ½–1½" away from your bust point. This will prevent your dress's bust from looking too pointy or having an irregular shape.
Other than that, sewing darts on a dress is just the same as sewing them on other garments.
If you're up for the challenge, it's a good idea to practice all three types of darts, so you'll be ready for whatever your dress pattern calls for.
Common Problems While Sewing Darts and How to Fix Them
Puckering at the Dart Tip
If your fabric is gathering at the dart tip, remove your stitches and try these fixes:
- Don't backstitch the tip - you'll want your thread to run off the fabric and knot the end. Backstitching at the dart tip causes the fabric to gather.
- Shorten your stitch length at the tip - you'll want to use the shortest stitch length in your machine when you sew from the punch hole to the end of your fabric.
- Press your dart - pressing your dart after sewing is a great way to give it a clean, professional finish and to avoid puckering.
Misaligned Dart Legs
Misaligned dart legs will make your garment look crude and homemade. Here are some ways to prevent this from happening:
- Mark carefully - marking is ever so important when it comes to sewing darts. That's why you'll want to take extra care when doing this to avoid misaligned dart legs.
- Pin carefully - as you insert a pin into the dart legs, make sure both legs are aligned perfectly. For longer darts, use several pins or hand baste to ensure the fabric doesn't shift as you sew.
- Double check! - The secret to properly aligned darts is to always double-check every step of the way. From marking your fabric to sewing the dart legs, don't move to the next step if you're not 100% certain everything is properly aligned.
Stitches Aren't Straight
If your pattern calls for a curved dart, sewing a smooth line can be challenging. Here are some tips for this:
- Sew slowly - don't rush while sewing. Use both hands to gently glide your fabric along the seamlines. If you're having a hard time, using a shorter stitch length can also help with control.
- Practice on scrap - sewing on scrap fabric first is a great way to practice getting smooth curves. Practice until you're confident you can get a nice flowing stitch on your actual garment.
Take Your Sewing Skills to the Next Level
Sewing darts is one of the best ways to give your garments a professional look.
However, taking your sewing projects to the next level takes more than just adding darts here and there.
If you want your clothes to not only look "nice" ...
But to actually wow your friends and have them begging you to tell you where you bought it (while you smirk as you prepare to tell them YOU sew it)…
Then you should check out our FREE workshop!
In it, we'll teach you the five secret techniques to take your homemade clothes and give them a designer finish.
Best of all?
You don't need any fancy equipment to learn any of these techniques.
So go and get your free training below!
 Gallery
 Blog
Blog Events
 Notions & Tools
 Tutorials
 Craftsy
